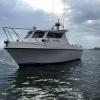
Adam F Posted October 18, 2004 Report Share Posted October 18, 2004 It has now been 3 weeks since the little incident at Kimmeridge. Blue Warrior has sat on the drive since and I havent been out. Seeing as Im on holiday all this week and Egypt has been cancelled due to a new 60hp Mariner, Rach and I decided to make the most of the sunshine and get a few hours in. Rather strange launching BW again after last time, kept remembering how bad it all was, but pleased to report all went fine and we had a good day to boot. I just wanted to run the engines up, and check the boat was OK after her repairs. She is fine and good as new. Rach however seems to have been bitten by the fishing bug!! 5 hours of fishing and the tide is dropping by the second and she still insists on 'just one more cast!'......I was packed up and waiting to go home! We had a good day fishing the shallow water ledge marks. Final tally: 30 odd Wrasse (corkwing, ballan, rock cook and cuckoo) to 3lb, doggies and a lovely 6lb Small eyed...mosted to rach's rods! Came in at 5pm, overall a great day, nice and relaxing and good to get out again! Thurs is back to 'proper' fishing....James and I are having a trip from Weymouth. Quote Link to comment Share on other sites More sharing options...
Coddy Posted October 18, 2004 Report Share Posted October 18, 2004 Hi Adam Been meaning to ask do you have a keel band on BW? If so did it help save the boat in anyway? If not would it have helped? Coddy Quote Link to comment Share on other sites More sharing options...
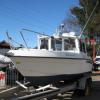
Adam F Posted October 18, 2004 Author Report Share Posted October 18, 2004 Is wish I did have...had I done (and Bob for that matter) it would have meant only skin scratches for BW - all of the damage was along the keel. I have now stripped the antifouling and am begining the tedious job of sanding and polishing the hull. On top of replacing the windows and polishing the hull, a keel band is top priority. I am thinking of using S/S and sikflexing / SS Self tapping it to the keel. I need a source of material, and also need to know whether the band is a constant width for the whole length or if it is profiled to match the Warrior's keel? Quote Link to comment Share on other sites More sharing options...
Seamouse Posted October 19, 2004 Report Share Posted October 19, 2004 Adam, I used 3mm marine grade (316) stainless strip and bought it from a steel merchant here in London. There's bound to be one local to you, took mine about three days to source it for me. Had to buy complete 4m lengths for marine grade as they can't use offcuts and I got two widths, 50mm and 20mm. Total cost 50 quid including a sheet of 1mm stainless to make an anchor bash-plate. Fitting was surprisingly easy. The 20mm stuff I ran back until the keel started to widen. From that point I cut a length of 50mm to reach the kick-up where the bilge starts. Then a seperate small strip of 50mm for the bilge area. The 20mm was screwed and sikaflexed in first. Then I trial fitted the long 50mm length, marked up the area at the front where it was wider than the actual keel and angle ground it back to match the keel profile. Finally the bilge section which can be bolted rather than screwed. You'll need several lengths of stainless screws as at places the keel wood is well above the gel coat. Drill an undersize pilot hole into the hardwood but then take out the gelcoat to the width of the screw you are using, otherwise you'll crack the laminate. The slower-drying Sikaflex might be a good plan too. Stainless was easy enough to drill on a slow drill speed and plenty of oil, needs to be countersunk too. If the screw heads are still a bit proud, grind them back or they'll play hell with the keel rollers. Steve Quote Link to comment Share on other sites More sharing options...
Adam F Posted October 19, 2004 Author Report Share Posted October 19, 2004 Thanks for the advice Steve. One last question - How did you gain access to the keel along the full length whilst on the trailer? Mine touches the keel rollers in two places? Quote Link to comment Share on other sites More sharing options...
Seamouse Posted October 20, 2004 Report Share Posted October 20, 2004 Hi, The roller at the middle of the keel is height-adjustable, just undo the nut and it will drop down. Mark it first so you go back into the same position, though mine doesn't contact the keel anyway once the boat is fully on the trailer. Next roller forward is fixed and contacts, as does the one at the lower curve of the bow. These two require you to roll the boat back a bit on the trailer. Hitch the trailer to the car first!!! I only needed to drop back a foot or two but if you go further or leave it like that for any length of time, it might be worth lightly supporting the skeg with a trolley jack just to avoid putting too much leverage on the rear section of the hull. As the boat goes back the keel at the front starts to lift, which makes access under the front rollers easier. Sod's Law dictates that at least one screw hole in the keel band will line up with a roller and be a total swine to access with a drill. FWIW, I spaced the screw holes ten inch apart. That's a lot of holes in your hull, made me a little nervous when I got the drill out. I also pumped each drill hole full of Sikaflex just before I put the screw in. Belt and braces Steve Quote Link to comment Share on other sites More sharing options...


Recommended Posts
Join the conversation
You can post now and register later. If you have an account, sign in now to post with your account.